Photoshop Advanced Masking
This tutorial will cover the contrast masking technique I use to blend a foreground image with a stacked startrail image. It can also be used on a single image to isolate the sky from the foreground for the purpose of applying selective processing, and can be used to replace skies or other elements in an image.
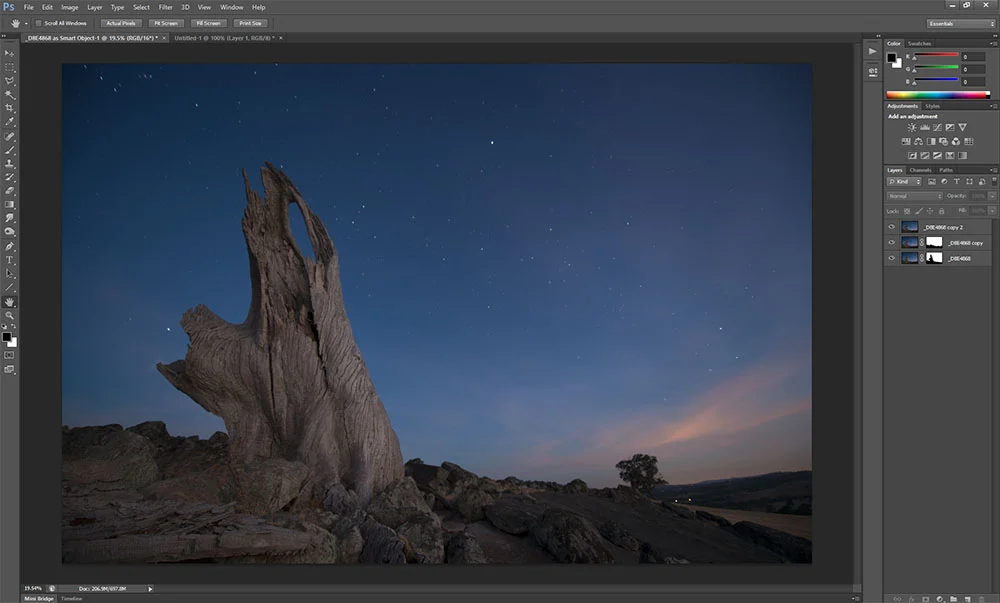
The foreground is captured during twilight, at low ISO and small aperture to get the best possible lighting on the foreground elements of the shot.
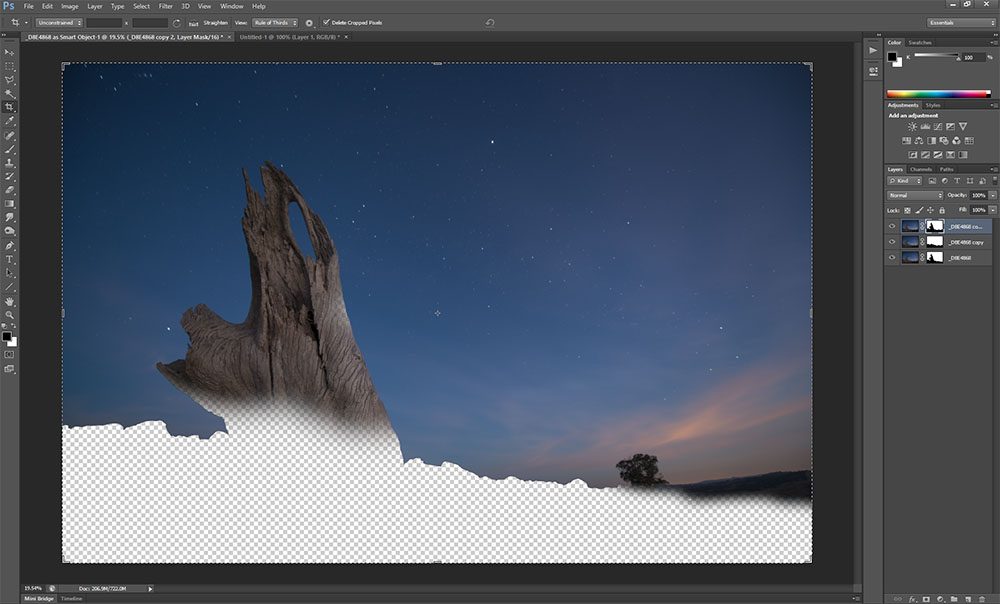
The objective is to create a mask that obscures the sky in the foreground image, allowing the sky from the stacked image to show through.
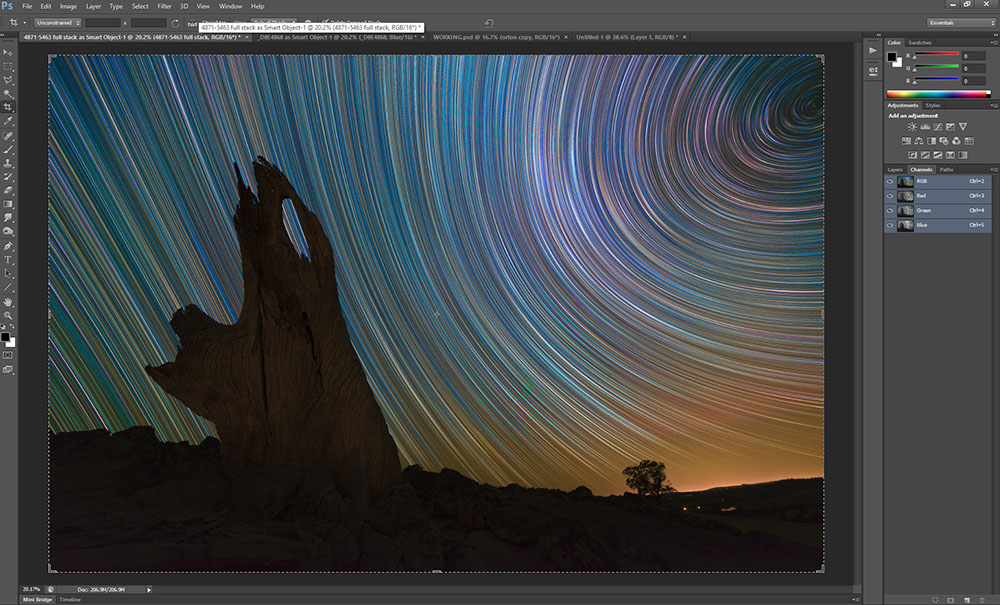
Here are the two images to be blended, on the left is the foreground image, on the right is the stacked startrail image. The stacking technique is detailed in this post: http://www.lincolnharrison.com/blog/2013/8/4/photoshop-cs6-image-stacking
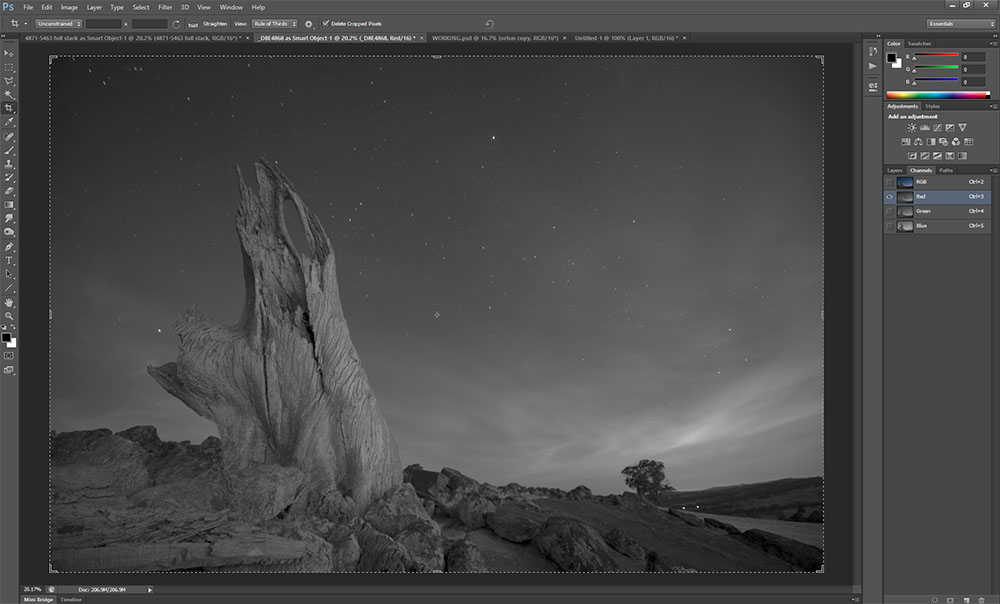
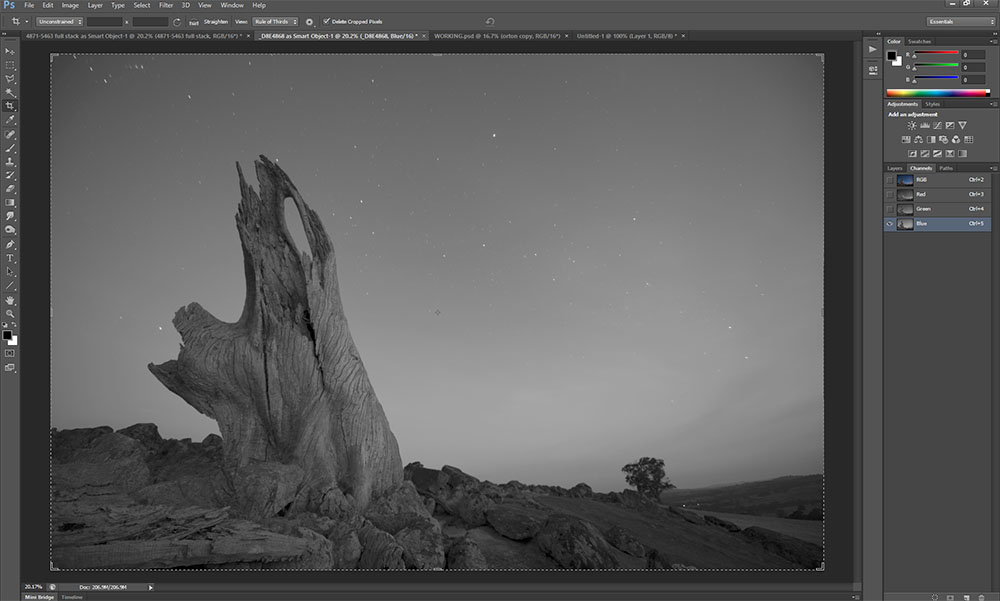
Open the foreground image and select the channels palette (next to the layers palette). From here we can select the individual red, green and blue color channels. The goal here is to find which of these channels gives the strongest contrast between the foreground elements and the sky.
The blue channel (bottom image) gives the best contrast between the sky and the foreground elements. Depending on the colors in the image you have the red or green might give better results.
Right click on the blue channel and select 'duplicate channel'. You will now have a channel named 'blue copy' at the bottom of the channels palette. Using the eye icon to the right of the channels, we need to hide all channels except for the 'blue copy'.
Go to the 'Image' menu at the top of the CS6 window, select adjustments>curves. Using the sliders at the bottom of the histogram we want to increase the contrast of the image but don't let it clip the whites or blacks in any of the areas where the sky meets the foreground.
Now select the brush tool and set the brush mode to 'overlay'.
I have my brush opacity set to 100% but I am using a Wacom tablet which is pressure sensitive, if you are using a mouse an opacity of around 30% should work better.
Set your brush colors to black and white, using white paint over the white areas (sky) of the image. Very dark areas of the image will not be affected by the overlay brush so you don't have to be extremely accurate with your brush strokes.
Now switch the brush color over to black, and repeat the process on the darker foreground areas of the image. There will be some areas around the edges that are grey, keep switching between the black and white brush and reduce brush size until you get these area right . The goal is to only have black and white in the image, no grey.
When there's no obvious grey areas go to the 'Image' menu again, and select 'adjustments>curves'.
As you can see from the histogram, there are some areas of grey still in the image. Move the sliders below the histogram towards the center to eliminate these grey areas.
Closely inspect the image and manually paint over any areas that were missed. For example the top corners of the image, and the horizon to the right of the small tree.
Now hold down the CTRL key and click on the 'Blue copy' channel, this will place a selection around the white areas of the mask. Select the Layers palette, and click on the 'add layer mask' button at the bottom of the palette.
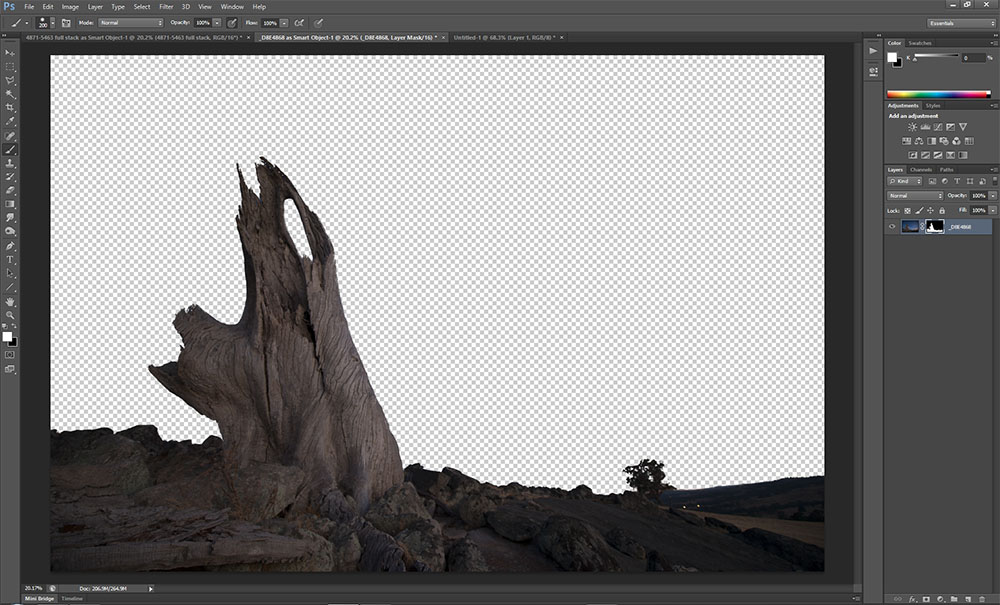
The new channel we created will now be applied to the original foreground image as a mask. With the mask selected, press CTRL+i to invert the mask. you should now see the foreground image with the sky completely masked out.
The next step is to place the stacked startrail image onto the foreground image. To do this open the startrail image, while holding the SHIFT key press A (select all) and C (copy), now go to the foreground image, hold SHIFT and press V (paste). Place the startrail layer below the foreground layer (if there is a padlock icon showing on either layer drag it down to the trashcan at the bottom of the palette to unlock the layer), you should now see something like this:
Closely inspect the image to ensure the mask is accurate. In most cases this will be the end of the masking process and you can move on to the final processing of the image, but sometimes the two images will not match up perfectly due to the ambient temperature dropping between the twilight image and the startrail image, which can cause a slight focus shift.
If you can see dark areas from the startrail image around the edges of the foreground elements you can use the 'maximum' filter to expand the area of the mask.
In the case of this image the two lined up quite well, but I have tweaked the size of the mask to give an example of what you might see.
With the mask selected, go to the Filter menu, select other>maximum. I have the radius set to 7 pixels in this example because I used a 7 pixel minimum filter to exaggerate the effect, normally 1 or 2 pixels will be sufficient.
You might find with some foreground images there are areas of low contrast, which make it difficult to get an accurate mask. Normally you can overcome this by zooming in and manually touching up the area with a small brush. In extreme circumstances this doesn't work so well, the solution here is to generate a secondary mask and intersect it with the first mask.
Start by opening another copy of the original foreground image in a new window, we are going to repeat the steps from the start of the tutorial but this time we will concentrate only on the problem areas we encountered in the first mask.
Sometimes you might get better results by using a different color channel than the one you used the first time round, if you look at the 3 color channels posted above you will see the red channel has better contrast in the bottom right corner of the image, but overall it isn't as good as the blue channel .
When you get to the point where you have applied the new channel to the duplicate foreground image as a mask you need to copy and paste the layer onto the original foreground image.
Rather than go back and generate a second mask from scratch when its not needed for this image, I have duplicated the original mask and made some adjustments to both to illustrate the technique.
Lets assume that the first mask had problems in the bottom right corner:
When generating the second mask we concentrated on getting the bottom right corner correct, and ignored the other areas of the mask, such as the large tree stump.
We have 2 copies of the foreground image, one has the first mask applied, the other has the second mask applied.
Duplicate the top layer, and delete the mask from the new layer. We now need to invert both masks, do so by selecting the mask and press CTRL+i.
To intersect the two masks, hold the CTRL key and click on the first mask (either one), this will place a selection around the white areas, now hold CTRL+SHIFT+ALT and click on the second mask. The selection will now encompass the 'good' areas of both masks.
Select the top layer, and press the create layer mask button at the bottom of the layer palette to apply the selection as a mask.
You should see something like this:
Delete the two bottom layers, they are no longer needed, select the mask on the top layer and press CTRL+i to invert the mask. The result is a combination of the 2 masks, taking the good areas from each one.
This new mask is not currently saved as a channel, only as a mask, which means if you flatten the image it will be lost. The mask will come in handy when you do the final editing of the image so go to the channels palette, you will see the mask on there, right click it and select duplicate channel. It will now be saved on your channels palette for future use.


